The Ultimate Guide to Dehydrating Chives: From Garden to Storage
Dehydrating Chives freshness is retained and their shelf life is increased by dehydrating them. Learn how to dehydrate chives using a variety of appliances, such as an oven, microwave, dehydrator, or air fryer, and come up with inventive ways to use them in your food. With this adaptable herb, you can enhance your recipes while reserving your garden’s or the market’s abundance for later use.

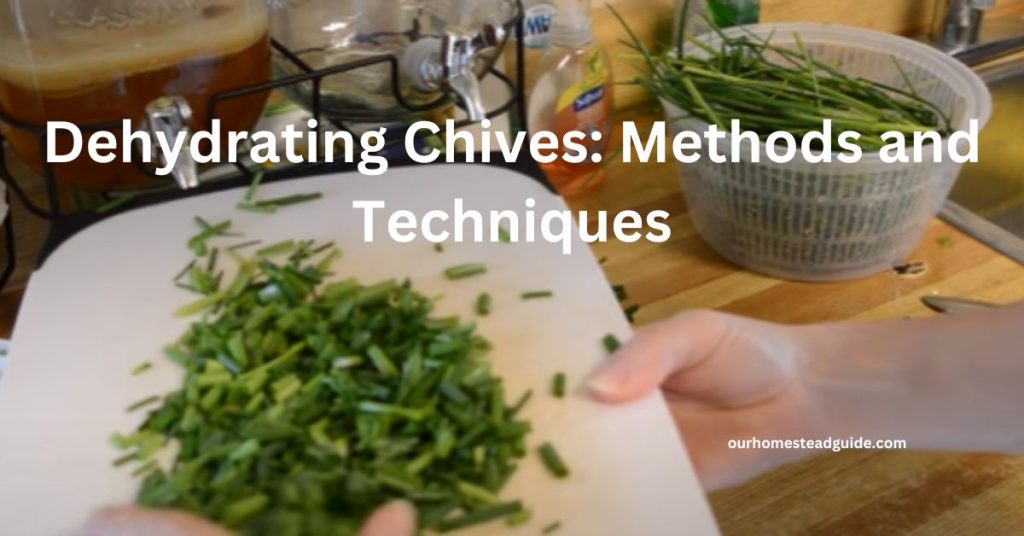
Dehydrating Chives: Methods and Techniques
Dehydrating Chives in an Air Fryer:
Air fryer dehydrating chives is a quick and easy approach. Simply cut them, spread them out, and place them in the air fryer for 1-2 hours on low heat. The result is crispy, flavor-packed chives that can be used to season a number of foods.
Dehydrating Chives in an Oven:
Dehydrating chives in the oven is a simple technique. To begin, wash and chop the chives into uniform pieces. Then, spread them evenly on a baking sheet and bake for 2-4 hours at the lowest possible temperature, usually about 140°F (60°C). Slow, careful heat will transform them into crispy, aromatic chives perfect for seasoning your dishes.
Using a Dehydrator for Chives:
Using a Dehydrating Chives is a really effective way. Arrange the chives on the dehydrator trays after washing and slicing them into uniform pieces. Allow them to dry for 4-6 hours at a temperature of 95-115°F (35-46°C). The controlled climate of the dehydrator offers perfectly preserved chives, excellent for embellishing your cuisine all year.
Quick and Easy Microwave Dehydration:
Dehydrating Chives Try the microwave for quick chive dehydration. To begin, wash and cut the chives into small, consistent pieces. Place them on a microwave-safe pan and microwave in 30-second increments, checking and stirring every 30 seconds, until crispy, about 2-3 minutes. This simple microwave dehydration method yields fast, tasty chives for your culinary pursuits.
Types of Dehydrating Chives
Dehydrator for Food:
A food dehydrator is an electric device built particularly for drying various foods. It contains trays for storing sliced or chopped chives, as well as a fan that circulates heated air to reduce dampness.
Advantages: include precise temperature control, uniform drying, and herb-specific settings.
Dehydration in the Oven:
Dehydrating chives in the oven entails putting chopped chives on a baking sheet and setting them in a low-temperature oven.
Advantages: This method is accessible to individuals who do not have a dehydrator, albeit it may take longer.
Air-Drying:
Chives may be air-dried by tying them together in tiny bunches and hanging them in a dry, well-ventilated location until completely desiccated.
Advantages: Simple and requires little equipment.
Dehydration by Microwave:
While it is less popular, some individuals use a microwave to dehydrate herbs. Chives are placed between paper towels and microwaved in short bursts until dry.
Advantages: Quick, although close supervision is required to avoid overcooking.
Preparing Chives for Dehydration:
The first step in preserving chives is to prepare them for dehydration. Begin by properly cleaning them to eliminate any dirt or debris. To ensure even drying, slice the chives into uniform pieces. Whether you use an oven, dehydrator, air fryer, or microwave, careful preparation ensures tasty and long-lasting dried chives that may be used to improve a variety of recipes.
Dehydrating Time for Chives:
Dehydrating chives takes 2-4 hours in an oven or dehydrator at 140°F, 1-2 hours in an air fryer on the lowest setting, and 2-3 minutes in the microwave with constant monitoring. The objective is complete drying to preserve flavor and extend shelf life.
How to Know When Chives Are Dehydrated:
It is critical to know when chives are totally dehydrated in order to preserve their flavor and quality. To the touch, they should be brittle rather than supple. They will also collapse readily when crushed. Finally, the color should remain brilliant green, suggesting that the essential oils and flavor have been kept.
Nutrition and Health Benefits
Dehydrating Chives provide a concentrated dose of vital nutrients such as vitamins A, C, and K, as well as minerals such as calcium and iron. Chives retain many of these vital elements when dehydrated, making them an easy complement to a variety of meals.
Chives also give health benefits such as immune system support and possibly anti-inflammatory qualities ascribed to flavonoids. They may help with digestion and support heart health. Furthermore, their low-calorie count and rich flavor make them a good choice for people wishing to add variety to their diet while keeping a reasonable calorie intake.
How to Dry Chives in the Oven
Oven-drying herbs may appear straightforward, but it is more difficult than other drying procedures. Many ovens do not go low enough to achieve the appropriate herb-drying temperature (about 100°F), and plants require enough air circulation to dry effectively. If you want to attempt drying your chives in the oven, here are the steps:
1-Wash and wipe dry the chives:
Before drying your chive leaves, make sure they are clean and free of dirt or bugs. Rinse with cold water and wipe dry with a paper towel. Allow them to dry for at least fifteen minutes on a paper towel to eliminate excess moisture. You can finely slice them at this point, but it isn’t required.
2-Determine the temperature:
To dry your chives, preheat your oven to 100 degrees Fahrenheit. An oven thermometer can assist you in determining the lowest temperature that your oven can achieve.
3-Place the chives in the oven to cook:
set your chives in a single layer on cheesecloth or parchment paper and set them on the wire rack in the center of the oven, allowing air to circulate beneath them. As long as air can flow beneath the chives, you may also use an insertable wire rack hanging over a baking sheet.
4-Air should be circulated:
To maintain their essential oils, most herbs require enough air circulation throughout the drying process. If you have an electric oven, keep the door open while the chives dry to allow for proper air circulation. However, if you have a gas oven, do not leave it open—cooking with a gas oven door ajar is dangerous. Instead, every four to five minutes, open the door to allow the air to circulate.
5-Allow one hour to dry:
It will take around an hour for your chives to dry completely in the oven. If they’re taking longer to dry, turn them over to promote equal drying. When the leaves snap when touched, they are sufficiently dry.
How to Use Dried Chives
- Chives have a mild onion taste that works well in soups, salads, stews, sour cream, and egg, meat, and fish recipes.
- Dried chives are just as wonderful as fresh chives, but you should use them earlier than fresh chives to allow the taste to truly come out and integrate well with the other components in the recipe.
- Just remember that one tablespoon of fresh chives equals one teaspoon of dry chives.
The Best Way to Preserve Chives
Aside from dehydrating fresh chives, there are several more unique and much more delicious ways to preserve them.
One of these is making chive oil. It’s a great dip for crusty bread or a prominent component in seared scallops and cauliflower soup.
You may also prepare chive butter, which is ideal for steak since it adds flavor and tenderness to the meal. Chive butter complements mashed or baked potatoes, as well as some fish and vegetable meals.
You may dry-freeze your prepared chives in a freezer-safe ziplock bag if you want another no-frills alternative. However, remove as much air as possible to ensure that the texture and flavor of the herbs are not damaged.
All of them are fantastic options, so simply select the way that works best with the meal in mind. You might also try creating all of them. It’ll be a lot of fun!
Serving Ideas:
- Incorporating Dehydrating Chives into your meals can improve the flavor of your dishes. For a taste boost, sprinkle them on top of omelets or scrambled eggs. To improve the flavor and aroma of soups, stews, and salads, add them. They’re also a tasty topping for baked potatoes or creamy dips.
- Consider infusing oils and vinegar with dehydrated chives for an added layer of chive flavor. Simply throw chives in a bottle with your preferred oil or vinegar and let them infuse for a few days to a week before straining and using in salads, marinades, or as a drizzle over roasted vegetables.
- Another inventive alternative is chive-flavored seasoning blends. Combine dehydrated chives with additional herbs and spices such as garlic powder, onion powder, and salt to make a flexible seasoning mix that can be used on meats, seafood, vegetables, or even popcorn for a savory twist. When it comes to incorporating dehydrated chives into your culinary arsenal, the choices are unlimited.
Storage and Processing

- Dehydrated chives must be stored carefully to retain their flavor and quality. After dehydrating, store them in an airtight container away from moisture and direct sunlight in a cold, dark place. For this purpose, vacuum-sealed bags or glass jars with tight-fitting lids work nicely.
- It’s a straightforward process to rehydrate dehydrated chives. Fill a small bowl halfway with boiling water and add the required number of chives. Allow them to soak for 10-15 minutes, or until they become pliable. Before using them in your dishes, drain excess water and blot them dry with a paper towel. Rehydrated chives retain a lot of their flavor and can be used in recipes much like fresh chives.
Most Frequently Asked Questions!
1-Why dehydrate chives?
Dehydrating chives helps to keep their taste for longer. It also decreases their mass, making them easier to store and incorporate into different recipes.
2-What equipment do I need for dehydrating chives?
A food dehydrator or oven, a sharp knife or scissors for chopping chives, and airtight storage containers are required.
3-How do I prepare chives for dehydration?
The chives should be washed and dried well. Remove any wilted or discolored sections. To facilitate dehydration, cut them into little pieces.
4- Can I dehydrate chives in an oven?
You certainly can. Preheat the oven to its lowest setting (about 140°F or 60°C) and put the chives on a baking sheet. Allow moisture to escape by slightly opening the oven door.
5-How long does it take to dehydrate chives?
It usually takes 4-6 hours in a food dehydrator at 95°F (35°C). It may take 2-3 hours at the lowest setting in an oven, with periodic stirring.
6-How do I know when chives are fully dehydrated?
When chives are crispy and readily crumble between your fingertips, they are totally dehydrated.
7- Can I dehydrate chives without a dehydrator or oven?
Yes, you can air-dry chives, but it will take a little longer. Bundle the chives and hang them somewhere dry and well-ventilated.
8-Do I need to blanch chives before dehydrating them?
Although blanching is not required for dehydrating chives, some people like blanching for a few seconds to maintain color.
9-How should I store dehydrated chives?
Dehydrated chives should be stored in sealed containers in a cold, dark environment. This helps to preserve their flavor and shelf life.
10-What dishes can I use dehydrated chives in?
Dehydrated chives can be used in a variety of meals, including soups, stews, sauces, salads, and others. They rehydrate well and offer a taste boost to your meals.
11-Can I rehydrate dehydrated chives?
Yes, you may rehydrate them by soaking them for a few minutes in warm water before using them in your recipes.
12-How long do dehydrated chives last?
Dehydrated chives may be kept correctly in sealed containers for many months to a year while retaining their taste.
you may also like this article.