
How to Paint a Room: Professionally 12 Easy Steps
Learning how to paint a room properly is essential for beginning DIY’ers, new homeowners, and veteran home improvement experts alike. Painting your room: Easy, budget-friendly, and even fixable if mistakes happen!

But before you roll on that first coat, arm yourself with expert tips. Gather tools, prep the walls, paint those edges, and roll smooth coats. Two coats later, enjoy your fresh new space!
12 Easy Steps
This chart lists the twelve stages of painting a room.
| Step | Task | Description |
|---|---|---|
| 1 | Gather Materials | Collect paint, primer, brushes, rollers, drop cloths, etc. |
| 2 | Prepare the Room | Remove furniture, cover floors, and patch any holes. |
| 3 | Clean and Sand Surfaces | Clean walls and sand any rough spots for a smooth finish. |
| 4 | Protect Fixtures and Trim | Use painter’s tape to protect baseboards and light switches. |
| 5 | Apply Primer | Apply a coat of primer to ensure even paint absorption. |
| 6 | Stir and Mix Paint | Thoroughly mix paint to ensure consistent color and finish. |
| 7 | Cut In with a Brush | Use a brush to paint corners, edges, and trim carefully. |
| 8 | Roll on the First Coat | Use a roller for large surfaces, applying an even coat. |
| 9 | Allow First Coat to Dry | Let the first coat dry completely before applying the next. |
| 10 | Apply Second Coat | Repeat the process with a second coat for better coverage. |
| 11 | Remove Painter’s Tape | Carefully remove tape after the paint has dried completely. |
| 12 | Clean Up and Inspect | Clean brushes, put furniture back, and inspect the finish. |
How to Paint a Room?
Gather Your Tools and Materials
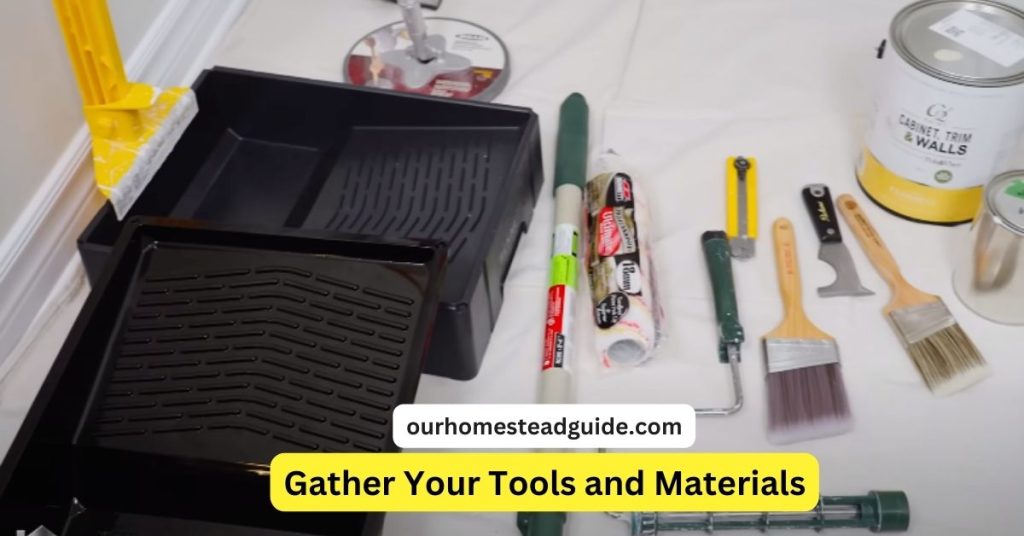
Paint Tray and Liner: For simple cleanup, use a paint tray with a liner.
Sherlock Handle and Wooster Cage: You can easily extend and retract your roller with the aid of these tools. For a smooth finish, use a microfiber roller sleeve.
3-Inch Angle Brush: Ideal for fine work and cutting in.
501 Tool: A screwdriver and scraper for a variety of uses.
A must-have tool for any cutting or trimming is the alpha knife.
Ladder: If necessary access higher locations.
Sanding Pad: To prepare the walls, use a sanding pad.
Paint Stick: A paint stick that makes painting more pleasant and effective.
Choose a Color

Don’t rush to grab that brush! Choosing a color comes first. Head to your local paint haven and grab some samples. Test them in different light corners, remembering, that light plays tricks on color! This way, you’ll find the perfect shade to transform your room.
Light and airy: A bedroom or living room would look great with pale blue walls and white trim since they provide a feeling of peace and roominess.
Warm and inviting: A dining area or home office would benefit greatly from the warm and friendly ambiance created by mustard yellow walls and brown wooden furnishings.
Bold and dramatic: Any area may be given flair and statement-making by using orange or yellow accents with deep charcoal gray walls.
Prepare the Room
Clean the Space: If at all feasible, tidy the space and take out any furniture.
Eliminate Cover Plates: Remove the covers from every outlet and switch.
Patch and Repair: Seal any holes and rectify any wall defects.
Trim Painting: Apply trim paint to ceilings and trim to hide blemishes and create neat edges.
Sand the Walls
Apply Sanding Sponge Use: For a better paint job, smooth out the walls.
Pay Attention to Your Flaws: Observe any spots that are uneven or grittier.
Paint the Ceiling
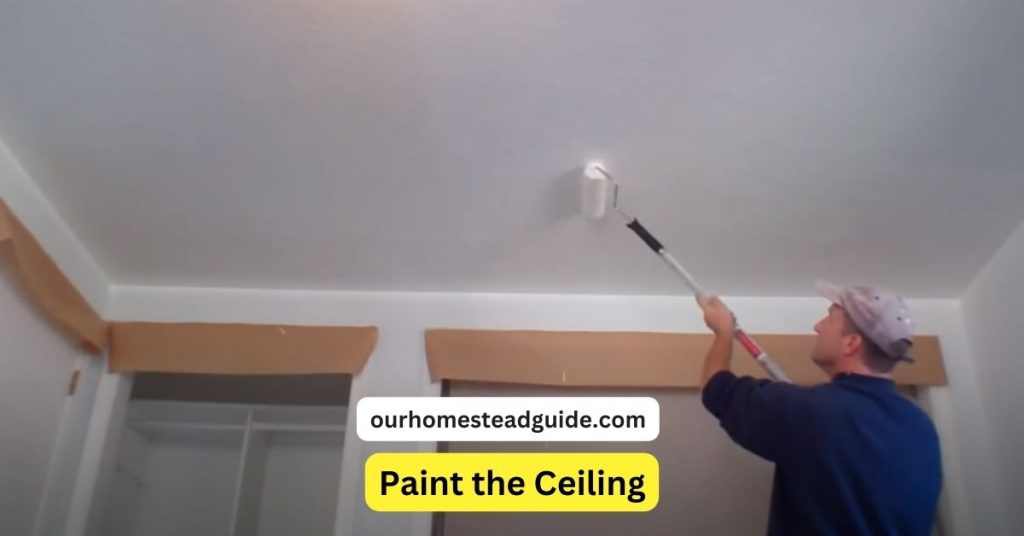
One of the most important steps in changing a room’s overall appearance and atmosphere is painting the ceiling. Start by painting the ceiling with a superior paint that goes well with the walls. For optimal efficiency, start in the middle of the roller and work your way outward to get a smooth, drip-free application. This sometimes-ignored chore gives the space a last touch and improves its visual attractiveness.
Mix your paint
Unleash your inner color alchemist and transform your room into a canvas of your creation! Ditch the store-bought shades and mix your masterpiece with a little magic and these simple steps:

Assemble your equipment: A stirring stick (a wooden dowel or even a clean paintbrush will do!) and a few small sample pots of primary and secondary colors (red, yellow, blue, green, orange, and purple) as your vibrant building blocks will help you channel your inner art-lab vibes.
Start simple: For example, combine red and blue to produce a captivating purple, or combine yellow and blue to create a vibrant green. Recall that less is more! Stirring like a witchcraft expert, add little quantities of one color to the other until the hue you want appears. It might be difficult to remove color, so proceed cautiously.
Try and improve: Don’t be hesitant to get your hands dirty! Test the mixture on a drywall or cardboard scrap by dipping a brush into it. Observe how the light interacts with your design and make color adjustments like a pro. You’ll become an expert at creating bespoke colors with a little practice!
Paint the Trim
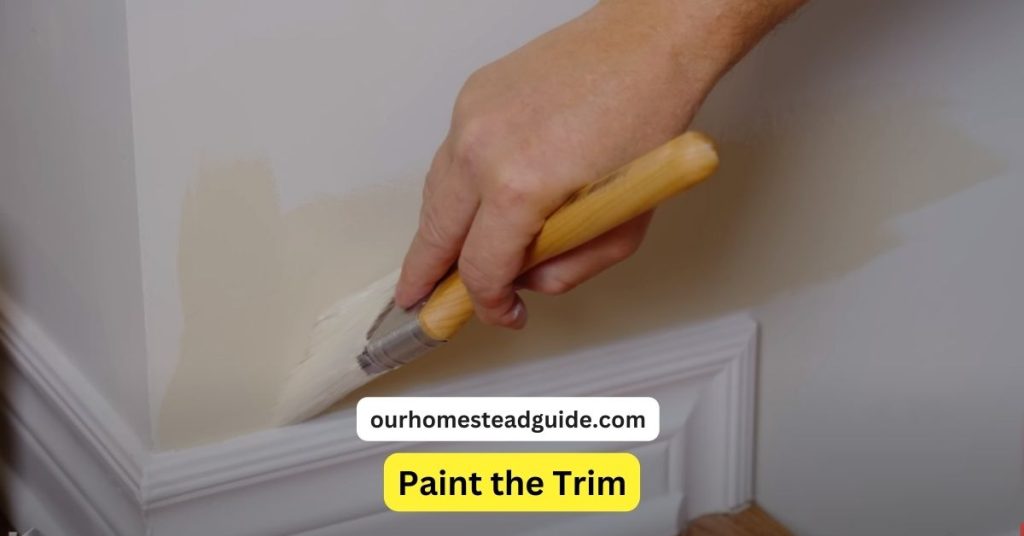
Trimming should never be an afterthought! It’s the masterpiece that is your room’s frame. The trim-painting trifecta is as follows:
Get ready like a pro: After filling up any nicks, give the foundation a gentle cleaning and sanding. Remember to tape off the floors and walls!
Use a delicate brush: An excellent angled brush is your best buddy. Use the flat side for bigger surfaces and delicate strokes to cut crisp lines around borders.
For ultimate perfection, layer: One thick gloop is not as good as two thin coatings. Apply fluidly in the direction of the grain, and never forget that a clean, polished finish requires time.
Cut-In and First Coat
Fill the Paintbrush: Fill the paintbrush to a depth of roughly 2.5 inches.
Outside Corners: For sharp outside corners, use the heel of the brush.
Paint Trim: Beginning at the top, brush paint onto the trim.
Roll the Walls: Fill the roller with the whole line and apply paint in a uniform layer.
Roll in One Direction: To get an equal texture, roll consistently in one direction.
Use a Paint Stick: For simpler and more controlled rolling, use a paint stick.
Second Coat and Final Touches
Hold off till drying Give the initial coat time to fully dry. Sand Once Again Resand the walls to get a smoother surface. a second cut-in Apply the brush to the edges for a precise cut.
Second Roll: To keep a moist edge, apply the second coat with the roller. Complete Each Surface Separately by cutting and rolling each surface. Examine the Consistency Assure uniform hide and texture. Give It Enough Time to Dry A minimum of 48 hours should pass before hanging anything on the walls.
Additional Tips:
- Steer clear of primer: It might not be required unless your home is older (built before 1975) or has certain characteristics.
- Good Paint and Tools: To paint more effectively and effortlessly, spend money on high-quality supplies and paint.
- Wet Edge: Take note of the wet edge to prevent paint lines from showing through.
- Curing Procedure: Give the paint at least 30 days to set up before cleaning it or using more force.
how to paint a wall design
To paint a wall with a distinctive pattern or mural, start by imagining what you want to paint. Make a paper sketch of your design to use as a guide. The wall should then be well-cleaned and have a smooth surface. Let a base layer of paint dry fully after applying a complementary color to your design.
After the base coat dries, divide and outline the various parts of your design using painter’s tape. By serving as a stencil, this tape will guarantee precise forms and lines. One color or design element at a time, apply them all, letting each layer dry completely before adding the next.
Finally, take great care to remove the painter’s tape so that your elaborate and expertly completed wall design is seen. Touch-ups or a little brush can be used to make adjustments as needed. This technique fosters creativity and turns a plain wall into a customized piece of art.
painting walls for beginners
To guarantee a seamless and fulfilling result, novices who are interested in wall painting should begin with a few basic procedures. Assemble the required supplies and equipment first: good paint, rollers, brushes, painter’s tape, drop cloths, and a paint tray. Spend some time carefully cleaning the walls and filling in any gaps or cracks with putty or spackle before you start painting.
If the walls aren’t painted or if there are noticeable color differences, apply a layer of priming. For an easier painting experience, use paint that is low in volatile organic compounds and easy to apply. Start the cutting-in process by painting with a brush along the edges and corners, being sure to cover nearby surfaces with painter’s tape.
After finishing the edges, work in tiny portions with a roller, making sure the edge stays wet to avoid obvious seams. Please take your time, let every coat dry fully, and don’t rush the procedure. For novices, painting walls can be a rewarding and pleasurable project with the correct planning and execution.
Conclusion:
How to Paint a Room! Your walls may soon be singing a brand-new song with a little preparation, the appropriate equipment, and a dash of imagination! Keep in mind that even the smallest brushstrokes may convey a message, so get out your paintbrush, find your inner creative, and enjoy making your room!
Most Frequently Asked Questions!
How to Paint a Room needs materials
- Paint
- Primer
- Drop cloths or plastic sheeting
- Painter’s tape
- Paint tray and liner
- Paint roller and roller covers
- Paintbrushes
- Extension pole
1- What tools do I need to paint a room?
Paint trays, rollers, brushes, painter’s tape, drop cloths, and a ladder are among the necessary equipment. Purchase high-quality rollers and brushes to achieve smoother results.
2- How do I prepare a room for painting?
Move furniture beforehand, or cover it with drop cloths. Apply painter’s tape to cover the trim and edges, clean the walls, and fix any flaws.
3- What type of paint should I use?
For a more odor-free and environmentally friendly experience, select a high-quality paint with the appropriate finish (matte, satin, or gloss) and take into account low-VOC choices.
4- Do I need to use a primer?
It is advised to use primer on freshly painted walls, surfaces with significant color changes, and uneven surfaces. It encourages a more consistent finish and enhances paint adherence.
5- How do I start painting the room?
Start by cutting in, and painting corners and edges with a brush. After finishing, use a roller for the bigger surfaces, using modest amounts of pressure to keep the edge moist.
6- Should I paint the ceiling or walls first?
Usually, begin with the ceiling and let it dry completely before moving on to the walls. If the ceiling is going to be painted a different color, though, you might choose to paint it last.
7- How many coats of paint do I need?
Usually, two coats are needed to provide an even and long-lasting finish. Before applying the next layer, let the previous one completely dry.
8- How do I prevent roller marks or streaks?
Stay away from packing the roller too full of paint, and roll from top to bottom in a steady rhythm. To even out any blemishes, back 10-roll while the paint is still wet.
9- Can I paint over wallpaper?
Paint may not adhere effectively, thus it’s typically not advised. For optimal results, prepare the surface and remove any wallpaper before painting.
10- How long should I wait between coats?
As a general rule, wait until the first coat is fully dry before applying the second coat, but do as instructed by the paint manufacturer. To expedite drying, make use of appropriate ventilation.
you may also like this article.