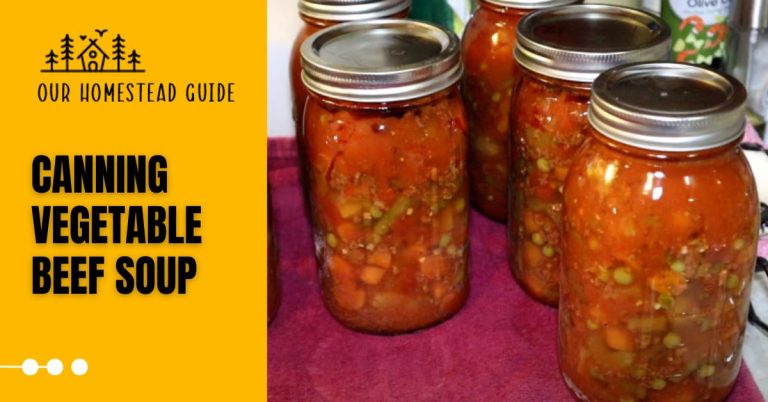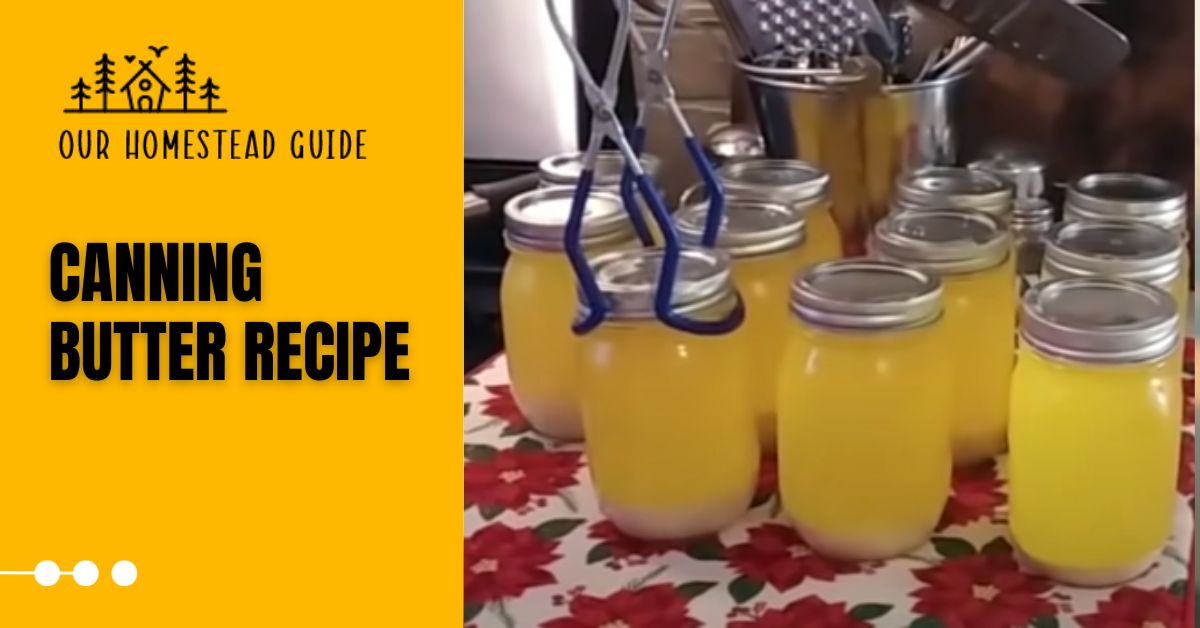
How to Canning Butter Recipe? Step by Step Guide
Canning Butter Recipe Butter can be preserved for long periods of time via canning, maintaining its availability even when fresh supplies are limited. This step-by-step guide will walk you through the process of making canned butter while offering crucial advice to guarantee that your canned butter turns out flawlessly each and every time.
Why Is Butter Necessary in an Emergency?
It is essential for our body to stay alive and nourished. If you didn’t know that your lack of it would actually kill you first you would die. Such information suggests that a dehydrated diet can also lead to early death. This is also because – but domesticated and raised for meat by the prepper, rabbits cannot be used as sole survival food.
Ultimately, what this means is that if you’re trying to stock up to save money on groceries (Six Dollar Family) or stockpile food for an emergency, fat Like butter, lard, and other healthy oils play an important role and should. The storage you create.
Nuts, fish, and seeds are also great ways to add these fats to your diet without overdoing it on unhealthy types.
Loss and Benefits of Canning Butter Recipe
Butter can be preserved for longer periods of time in case of crises, however, because of its low acidity, there is a botulism danger. Long shelf life, ease of use for outdoor activities, and flavor preservation are all advantages.
Canning Butter Recipe, However, complicated processing, potential changes in texture and flavor, and difficulties with quality control need careful thought. Make sure safe canning procedures are followed, and get advice from trustworthy sources.
How to Canning Butter Recipe?
1: Gather Your Supplies
Canning Butter Recipe Gather Your Materials
Verify that you have all the tools and materials on hand before beginning the canning procedure. You’ll require.
- jars for canning with lids and bands
- unsalted, fresh butter
- (Optional) Salt
- Pressure canner or boiling water bath canner
- sanitized dish cloths
- Jar raiser
- For optional seasoning, use a food processor or butter churn.
2-Prep Your Jars and Equipment
Gather Your Materials:
Before you start, assemble all of the required materials. A big kettle for boiling water (a canner), canning jars, lids, bands, a jar lifter, a funnel, clean cloth or paper towels, and warm, soapy water are all needed.
Examine Jars and Equipment:
Look for any indications of chips, cracks, or faults in each Jar. When canning, damaged jars won’t produce a good seal, which can cause spoiling. Canning Butter Recipe Additionally, check the lids for any dings or flaws that can interfere with their ability to seal.
Wash Your Equipment:
Use warm, soapy water to wash the jars, lids, and bands. To prevent leaving any residues that can impair the flavor of your preserved goods, use a light dish soap. The jar interiors can be cleaned with a bottle brush.
Rinse Thoroughly:
Rinse all the equipment thoroughly under running water to remove any soap residue. Canning Butter Recipe Make sure there are no traces of soap left, as it could interfere with the canning process and affect the flavors of your canned goods.
Air Dry:
Place the washed jars, lids, and bands on a clean dishcloth or paper towel to air dry. Avoid using a cloth that might introduce lint or other particles into the jars. Allow them to dry completely before proceeding.
Boil Lids and Bands:
Fill a small pot with water and bring it to a gentle simmer. Add the lids and bands to the simmering water for a few minutes. Canning Butter Recipe This step helps soften the sealing compound on the lids and prepares them for proper sealing. Do not boil them, as excessive heat can damage the sealing material.
Maintain a Clean Environment:
Keep a Clean and Sanitary Environment while Preparing Your Jars and Equipment. Keep your fingertips away from the jar interiors to prevent the introduction of pollutants. If required, handle the tools with clean tongs or a jar lifter.
Use Non-Metallic Utensils:
Canning Butter Recipe To prevent glass from being scratched or damaged, do not use metallic utensils while handling your jars and other equipment. Instead, choose utensils made of wood or plastic.
Prepare Your Canning Device:
If you’re using a water bath canner, make sure there is at least an inch of water in it above the jars. While you continue to prepare the jars, start boiling the water.
3: Prepare the Butter
Canning Butter Recipe Think about adding other flavors to your canned butter for a delectable twist. Now is the time to use a food processor or butter churn to incorporate herbs, garlic, or other flavors. Remember that the flavor’s potency will increase with time, highlighting the need for caution, especially when using strong seasonings.
Canning Butter Recipe This process enables your butter to develop into a distinctively flavored delight, enhancing numerous culinary endeavors, whether it is the warmth of herbs or the piquancy of garlic.
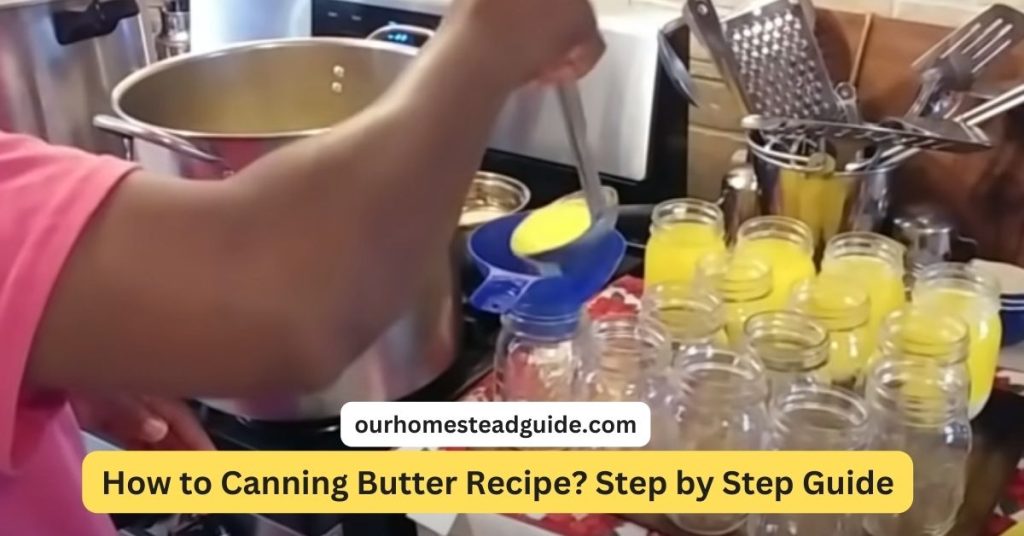
4: Fill the Jars
Start by chopping the butter into manageable chunks to make the filling procedure more efficient. Add a sprinkle of salt to each jar to improve preservation and flavor. After making these preparations, proceed to fill each jar with butter, making sure to leave about 1 inch of headspace from the rim.
Canning Butter Recipe In the end, wonderfully preserved and tasty butter that is ready to enrich your culinary masterpieces is produced thanks to this area, which permits expansion and proper sealing throughout the canning process.
5: Remove Air Bubbles
After filling, carefully remove any air bubbles that may have gotten stuck in the butter. Canning Butter Recipe Use a butter knife or a special bubble-removing instrument for this. By removing air pockets, this painstaking process protects your tinned butter from potential deterioration while also ensuring a strong and reliable seal.
6: Apply Lids and Bands
It’s time to seal your jars for the following step. Place the canning lids atop each jar with care, and then secure them with the bands. Avoid overtightening; a light fingertip tightening is adequate. Keep in mind that it’s essential to provide some space for air to escape throughout the processing stage.
Canning Butter Recipe The safe and efficient canning procedure is ensured by this precise sealing technique, which keeps your flavor-infused butter deliciously preserved and available to enhance your culinary creations.
7: Canning Process
In the seventh step of the canning process, the choice of canning method hinges on your equipment setup. If you’re utilizing a boiling water bath canner, arrange the filled jars within the canner, ensuring they are submerged under 1 to 2 inches of water. Gradually bring the water to a gentle boil and allow the jars to undergo the canning process for the recommended duration, typically spanning around 10 to 15 minutes.
Canning Butter Recipe Conversely, if a pressure canner is your tool of choice, adhere closely to its instructions for canning butter. Typically, this entails processing the jars at a pressure of 10 to 15 pounds, following a specified time frame to ensure safe and effective preservation.
8: Cool and Test Seals
After the processing stage, take care when removing the jars from the canner and placing them gently on a spotless dish towel to begin the chilling process. As the lids produce a satisfying “pop” sound to signal complete sealing, an audio treat is in store. Be patient while the jars cool further. Once the jars are at room temperature, push firmly on the center of each lid to check the integrity of the seals.
Canning Butter Recipe A jar that has been tightly closed will continue to stand strong, indicating that your careful efforts have produced the desired results.
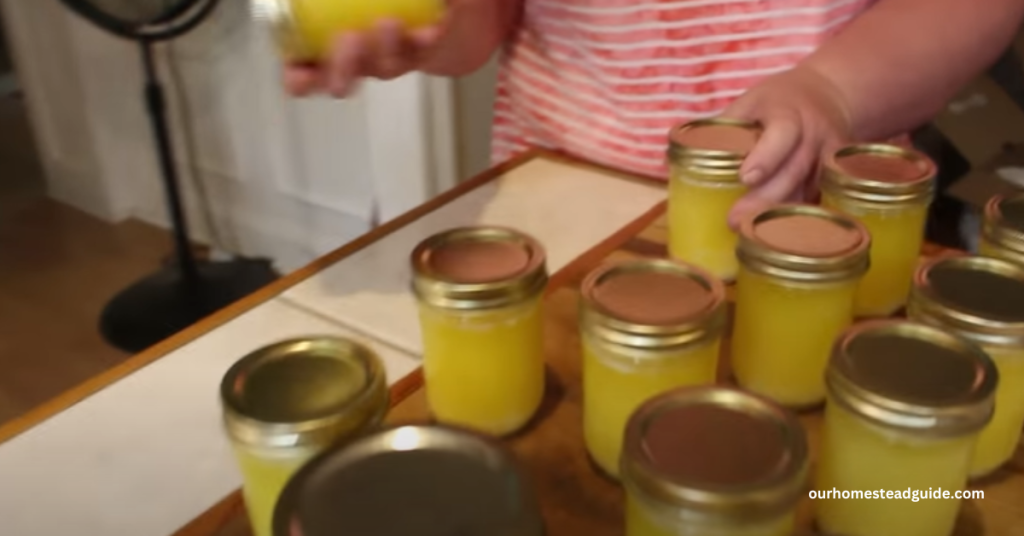
9: Label and Store
Labeling and storage are the final steps in this satisfying procedure. Make sure you clearly document the preparation of each jar by writing the date of canning on the label. As you’ve created these jars of delicious butter, keep them in a cool, darkly lit area to maintain their quality.
Canning Butter Recipe The end result of your diligent effort can be savored for a long time because canned butter that has been properly packed and preserved has the potential to keep its quality for a year or even longer, allowing you to enjoy the results of your labor for a very long time.
Information Table:
I’ve made a table that summarizes the major procedures and directions for canning butter:
| Step | Instruction |
| 1 | Gather Your Supplies |
| – Jars for canning with lids and bands | |
| – Unsalted, fresh butter | |
| – (Optional) Salt | |
| – Pressure canner or boiling water bath canner | |
| – Sanitized dish cloths | |
| – Jar raiser | |
| – (For optional seasoning) Food processor or butter churn | |
| 2 | Prep Your Jars and Equipment |
| – Gather all required materials, including a large kettle, canning jars, lids, bands, jar lifter, funnel, clean cloth or paper towels, and warm, soapy water | |
| – Examine jars and equipment for damage, chips, cracks, or flaws that may affect sealing | |
| – Wash jars, lids, and bands with warm, soapy water to remove residues | |
| – Rinse thoroughly to ensure no soap residue remains | |
| – Air dry the washed jars, lids, and bands on clean dishcloth or paper towels | |
| – Boil lids and bands in simmering water for a few minutes (do not boil excessively) | |
| – Maintain a clean and sanitary environment while handling equipment | |
| – Use non-metallic utensils to prevent scratching or damaging glass | |
| – Prepare your canning device (ensure water level for water bath canner) | |
| 3 | Prepare the Butter |
| – Consider adding flavor using a food processor or butter churn (take care with strong seasonings) | |
| – Enhance the butter with herbs, garlic, or other flavors | |
| 4 | Fill the Jars |
| – Chop butter into manageable chunks | |
| – Add a sprinkle of salt to each jar for preservation and flavor | |
| – Fill each jar with butter, leaving about 1 inch of headspace from the rim | |
| 5 | Remove Air Bubbles |
| – Carefully remove air bubbles in the butter using a butter knife or a bubble-removing tool | |
| – This step ensures a strong and reliable seal | |
| 6 | Apply Lids and Bands |
| – Sanitized dishcloths | |
| – Leave some space for air to escape during processing | |
| 7 | Canning Process |
| – Place canning lids on jars carefully, and secure them with bands (avoid overtightening) | |
| – Process jars according to recommended time and pressure for safety and preservation | |
| 8 | Cool and Test Seals |
| – Carefully remove jars from the canner and place them on a clean dish towel to cool | |
| – Listen for the “pop” sound, indicating a sealed jar | |
| – Check the seal integrity by pressing the center of each lid once jars are at room temperature | |
| 9 | Label and Store |
| – Label each jar with the canning date | |
| – Store the canned butter in a cool, dark place to maintain its quality for an extended period |
Is it Safe to Can Butter?
Canning butter can be done safely, but proper canning procedures must be followed to ensure that the butter remains safe to consume. Canning is a method of preserving food in a sealed container to prevent spoilage. Here are some important guidelines for safely canning butter:
Use correct canning equipment:
Make sure you have all of the necessary canning supplies, such as canning jars, lids, and a pressure canner. It is important to use the proper equipment while preserving butter.
Cleanliness:
Before you begin the canning process, be sure that all of your equipment and jars are clean and sterilized. This aids in the prevention of contamination and deterioration.
Use unsalted butter:
Unsalted butter is typically suggested for canning. Salted butter has different degrees of salt, which may alter the canning process and the end product’s quality.
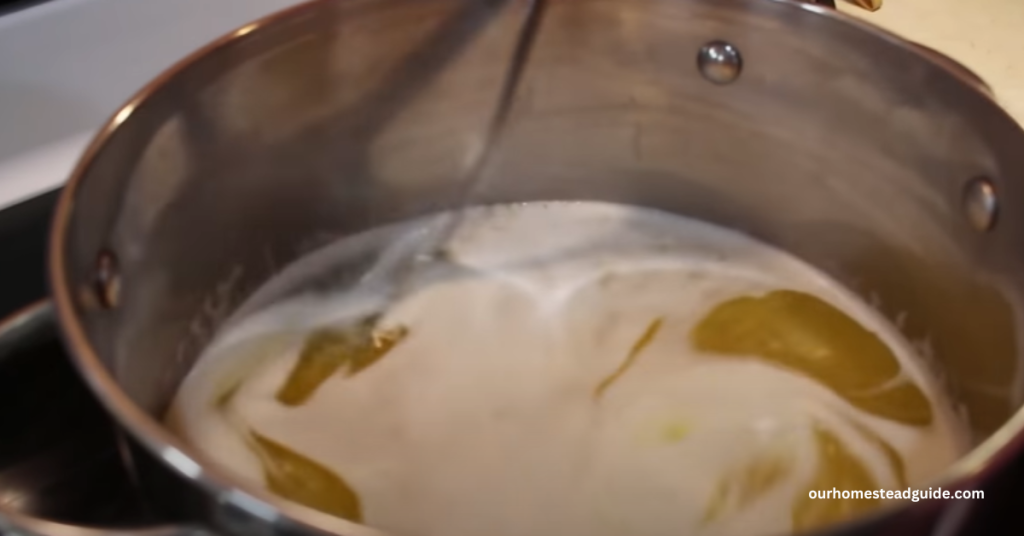
Melt the butter as follows:
In a saucepan, melt the butter and bring it to a boil. This will aid in the removal of any moisture and air bubbles from the butter, which can cause deterioration. Avoid overheating the butter.
Fill the jars as follows:
Fill sterilized canning jars halfway with melted butter, leaving 1/2-inch headspace at the top. Headspace is required for expansion during the canning process.
Close the jars:
Wipe the jar rims clean, then replace the sanitized lids and tighten the bands until they are fingertip-tight.
In a pressure canner, follow these steps:
Because butter is a low-acid product, it must be processed in a pressure canner to ensure its safety. Processing time and pressure will vary depending on altitude, so contact a reputable canning site or the manufacturer’s specifications for specifics.
Use the following processing times and pressures:
It is critical to follow the canning directions for your specific type of pressure canner, as well as the altitude restrictions. This keeps the butter safe and clear of germs like Clostridium botulinum, which flourish in low-oxygen settings.
Store and cool:
Allow the jars to cool naturally after processing. When the jars have cooled, check the seals to verify they are airtight. Keep the canned butter in a cold, dark, and dry location.
Examine for symptoms of spoilage:
Inspect the jars for any symptoms of deterioration, such as bulging lids, odd scents, or discoloration, before using the canned butter. If any of these are present, avoid eating the butter.
Success Strategies:
- For optimum results, only use premium, fresh butter.
- Before beginning, sanitize your jars and tools to ensure cleanliness.
- To ensure food safety, adhere to suggested processing times and procedures.
- Try out several seasonings to make flavored butter.
- Check stored jars frequently for symptoms of decomposition, such as mold or strange odors.
Conclusion:
Canning Butter Recipe is a satisfying approach to increase the shelf life of this indispensable household item. You may master the canning process by following this step-by-step instruction and applying the supplied advice, and you’ll be able to savor the savory flavor of preserved butter whenever you need it.
Most Frequently Asked Questions!
1- Is canning butter safe?
Yes, canning butter can be safe when done correctly following proper canning guidelines. It’s important to use the appropriate canning methods and equipment to ensure the butter is properly preserved and free from contamination.
2- Why should I butter instead of refrigerating it?
Canning butter provides a longer shelf life compared to refrigeration. Properly canned butter can last for up to a year or more, making it convenient for long-term storage without the need for continuous refrigeration.
3- Can I add herbs or garlic to my Canning Butter Recipe?
Canning Butter Recipe Yes, you can infuse your butter with herbs, garlic, or other seasonings for added flavor. Just ensure that you follow proper canning practices and consider the intensity of the flavors, as they may intensify over time.
4- How do I know if the jars are properly sealed?
After the jars have cooled, press down on the center of each lid. If it’s properly sealed, the lid should be firm and not move. A sealed lid will also make a popping sound when opened.
5- Can I use any type of butter for canning?
It’s recommended to use unsalted, high-quality butter for canning. Salted butter might affect the overall taste and texture of the canned butter.
6- What’s the difference between a water bath canner and a pressure canner?
A water bath canner is used for high-acid foods like fruits and tomatoes, while a pressure canner is necessary for low-acid foods like vegetables and meats. Canned butter falls under the category of low-acid foods and may require a pressure canner.
7- Can I reuse jars and lids for canning butter?
It’s generally recommended to use new lids for canning to ensure a proper seal. Jars can be reused as long as they’re in good condition with no cracks or chips.
8- Can I adjust the amount of salt in the recipe?
Yes, you can adjust the amount of salt according to your taste preferences. However, salt also serves as a preservative, so keep that in mind when making adjustments.
9- Can I use flavored butter for cooking and baking?
Absolutely! Flavored canned butter can add unique flavors to various dishes, from spreading on bread to cooking and baking. Be creative with your culinary endeavors.
10- What if I hear a “pop” sound after canning?
The “pop” sound you hear is likely the result of the jars properly sealing during the cooling process. It indicates a successful canning process and a secure seal.
you may also like this article.